Wondering how to connect to a MySQL server with ease? This guide is for you. We will describe two main ways using which you can connect to MySQL. The first method is where we will use SSH commands to connect with SQL. The next method is easier and gives more flexibility. The second method is where we will use a database tool to connect with MySQL.
Before we get into the methods, it’s important to know that in some servers, you will have to enable SSH. So, make sure that your remote host allows SSH connections.
Connecting to MySQL Using an SSH
Before we connect to MySQL using SSH, you will need an SSH client installed on your computer. Windows 10, Linux, and Mac OS come with pre-installed SSH. So, you don’t need to install it.
We will first see the command line interface. If you don’t want to enter these commands, you can skip to the next section where we will see an easy way to connect to MySQL using SSH.
Step 1: Set the Hostname
Once you install it, you can set the hostname and user ID. Use the following commands for it.
Set Host_Name = yourmysqlserverURL
Make sure you replace “yourmysqlserverURL” with the actual URL or IP address.
Step 2: Set the user ID
The next step is the top-set user ID. Enter the below-given command for it. Make sure you replace “Your_userid” with your user ID. Depending on your host, the user ID might be different from the username. Here, you will have to enter your ID.
set userid=your_userid
Step 3: Setup MySQL port forwarding
You can do a remote forward by entering the following command. You can use 3306 which is MySQL’s default port.
Set local_port: 3306, remote_host: yourmysqlservername_or_ip, remote_port: 3306
Don’t forget to replace yourmysqlservername with the server URL or IP address. In the same way, if you want to go with the local forward, you can use the below-given command.
Set port: 3306, host: localhost, remote port: 3306
Step 4: Connect with the server
The next step is to connect with the server using SSH. You can enter the following command for it.
Don’t forget to change the username to your original username.
In some cases, you will be asked to verify the hostname before continuing to the next step.
You can simply type “Yes” and you’re all set to head over to the next part.
This is where you will have to enter the password. You can enter the password. However, you will not see keystrokes. Therefore, you can enter your password and then hit enter to continue.
You have now successfully connected to the server.
Step 5: Connect to MySQL server
We can now connect to the MySQL server using the following command.
mysql -h dbDomain.example.com -u dbUser -p dbName
You need to replace dbDomain.example.com with your database domain name. In the same way, you also have to replace dbUser with your MySQL username and dbName with your database name.
Thereafter, you will be asked for the password. You can enter the password and you are in.
How to Connect to MySQL server via dbForge Studio
Now we will see how to connect to a MySQL server using an advanced tool called dbForge Studio. It’s a premium tool that allows you to tune up your workflow. The GUI tool allows you to connect with MySQL. The tool allows you to develop, manage, as well as administer MySQL databases with ease.
It’s a feature-rich tool that allows you to manage your database effectively. It allows you to compare databases and sync them. There are many other interesting features you can use such as SQL debugging.
Let’s see how to connect to the MySQL server via dbForge Studio. You can also connect to MySQL using SSH.
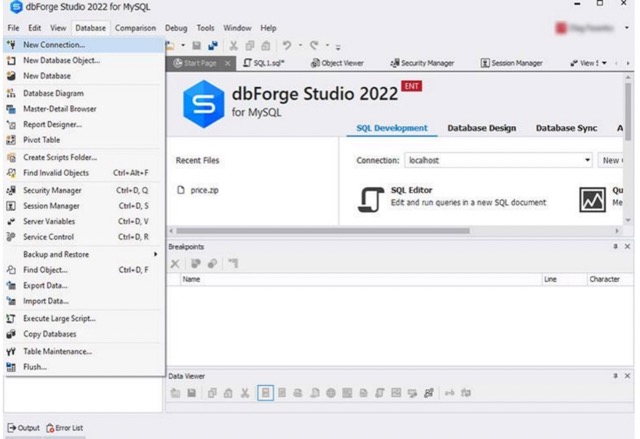
Step 1: Create a new Connection
The first step is to create a new connection. You can head over to the “Database” menu and click on “New connection”.
Step 2: Configure the Properties
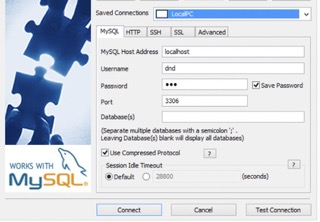
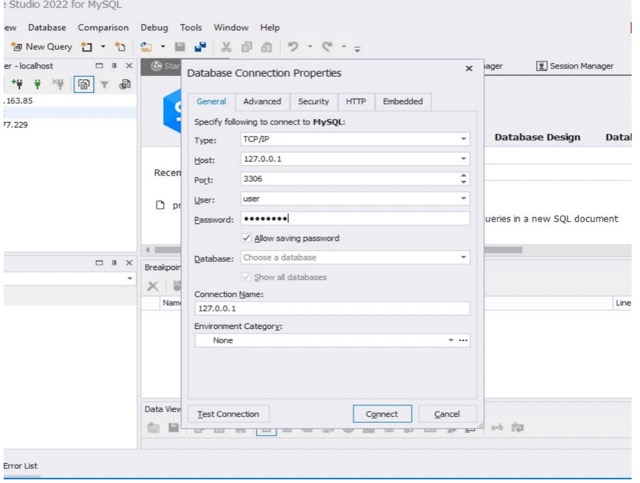
You will see a properties box where you need to enter the DB details.
- For connection type, you can enter TCP/IP.
- It will then ask for the hostname. It’s where you need to enter the hostname or IP.
- For the port number, you can type in your port. The default port is 3306.
- In the next two boxes, you can enter your username and password respectively.
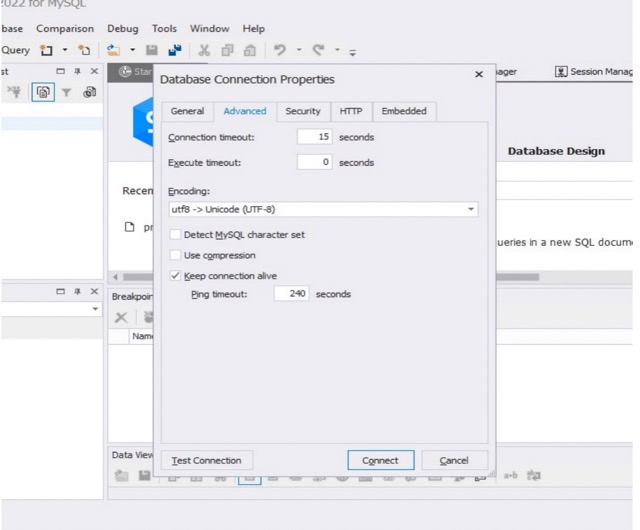
Step 3: Advanced Configuration for security and SSH (Optional)
If you are an advanced user, you can enter other details in other tabs. If you are just looking for an overview of how to connect to MySQL, this won’t be necessary.
The advanced tab is where you can enter the connection timeout and execution timeout values. These values are entered in seconds. You can also enable the encoding, and compression, and keep the connection alive. There are options to configure the connection alive settings.
For security settings, you can head over to the security tabs. It consists of connection types where you can select SSL or SSH. You can use SSH to connect with the database. The dbForge software makes it easier for you to connect using SSH. Further, you can also enter the client key, client certificate, authority certificate, etc. It gives you options to change the cipher for better security.
The HTTP tab is where you can configure HTTP properties and also set a proxy server.
Step 4: Test and Connect
The last step is where you can either test your connection before connecting or you can directly connect it to the server.
Summary
To summarize, you can either use SSH commands to connect to MySQL or you can use the GUI tool. If you’re wondering how to connect to a MySQL server with ease and get the most out of it, you should use the dbForge tool. The tool comes with many features for database management and administration. You should surely give it a try.


